Skip to content
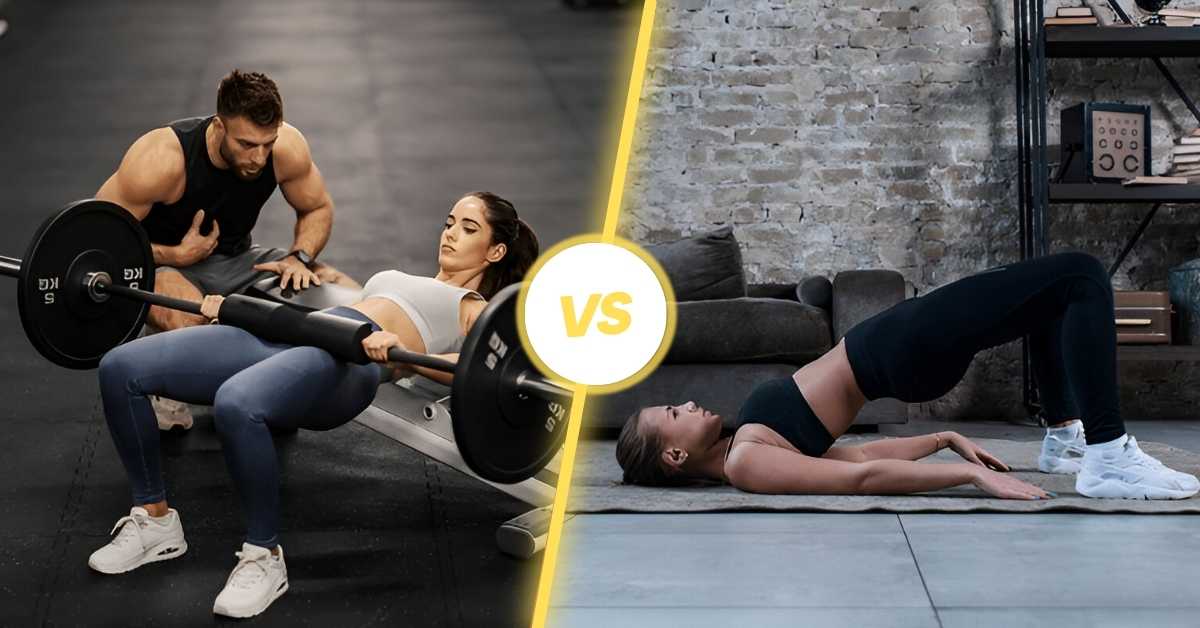
Have you ever wondered how to sculpt stronger, more toned glutes without wasting time on the wrong exercises?
If you’re into fitness, you’ve probably heard of glute bridges and hip thrusts. Both are powerhouse moves for building a stronger backside, but they’re not the same. As a certified personal trainer, I’ve seen countless clients transform their lower-body strength by choosing the right exercise for their goals.
In this guide, I’ll break down the differences, benefits, and which move is best for you—whether you’re a beginner hitting the gym for the first time or an advanced lifter chasing serious gains. Let’s dive in!
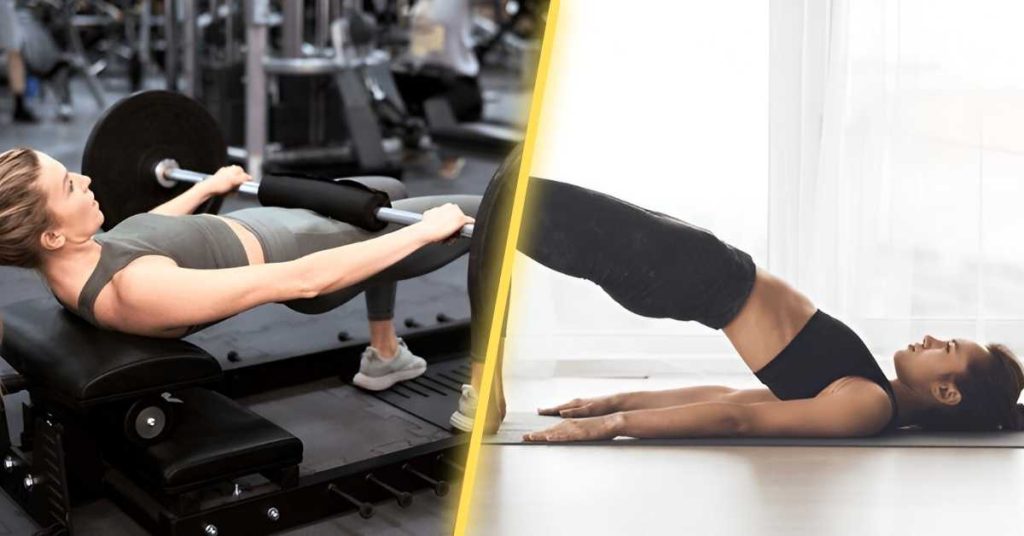
What Is a Glute Bridge?
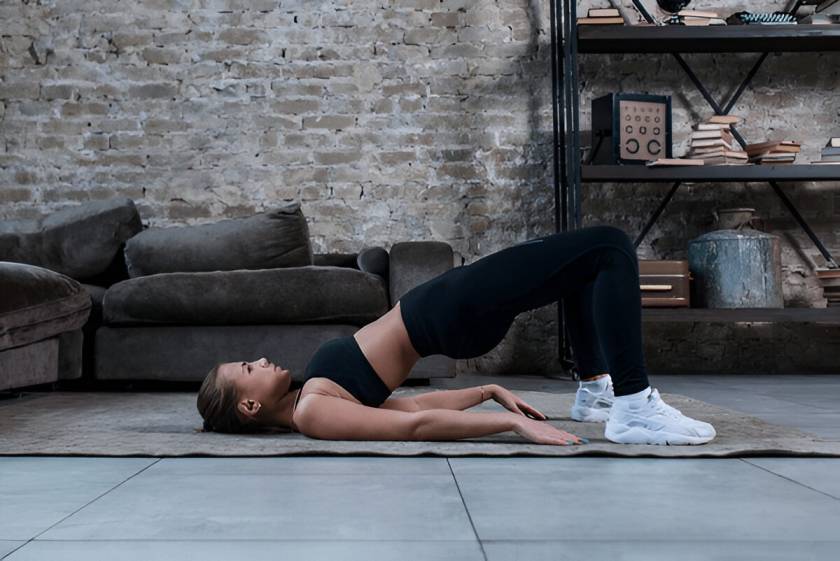
A glute bridge is a simple, beginner-friendly exercise you can do almost anywhere. You lie on your back, bend your knees, keep your feet flat on the floor, and lift your hips toward the ceiling. It’s like giving your glutes a wake-up call!
According to a 2015 study in the Journal of Strength and Conditioning Research, glute bridges effectively activate the gluteus maximus, the largest muscle in your backside, making them a go-to for strengthening your posterior chain.
Muscles Worked
- Primary: Gluteus maximus (the main booty muscle).
- Secondary: Hamstrings, core (abs and obliques), and lower back.
How to Do a Glute Bridge
- Lie on your back with knees bent and feet flat, hip-width apart.
- Keep your arms relaxed at your sides, palms down.
- Squeeze your glutes and lift your hips until your body forms a straight line from shoulders to knees.
- Hold for a second, then lower slowly.
Pro Tip: Push through your heels, not your toes, to really fire up those glutes. Avoid arching your lower back—keep it neutral to protect your spine.
Equipment Needed
You don’t need much! A yoga mat is nice for comfort, but you can do glute bridges with just your body weight. Want to level up? Add a dumbbell or barbell across your hips.
Variations to Try
- Single-Leg Glute Bridge: Lift one leg for a tougher challenge.
- Weighted Glute Bridge: Place a weight on your hips for extra resistance.
- Elevated Glute Bridge: Put your feet on a bench to increase the range of motion.
Common Mistakes
- Overarching the Back: This strains your spine. Keep your core tight.
- Pushing Through Toes: Focus on heels to target glutes, not quads.
- Not Engaging the Core: Brace your abs to stay stable.
Testimonial: “I started with glute bridges because I was new to working out,” says Sarah, a 28-year-old client. “They were so easy to learn, and in just a few weeks, I felt stronger and noticed my jeans fitting better!”
What Is a Hip Thrust?
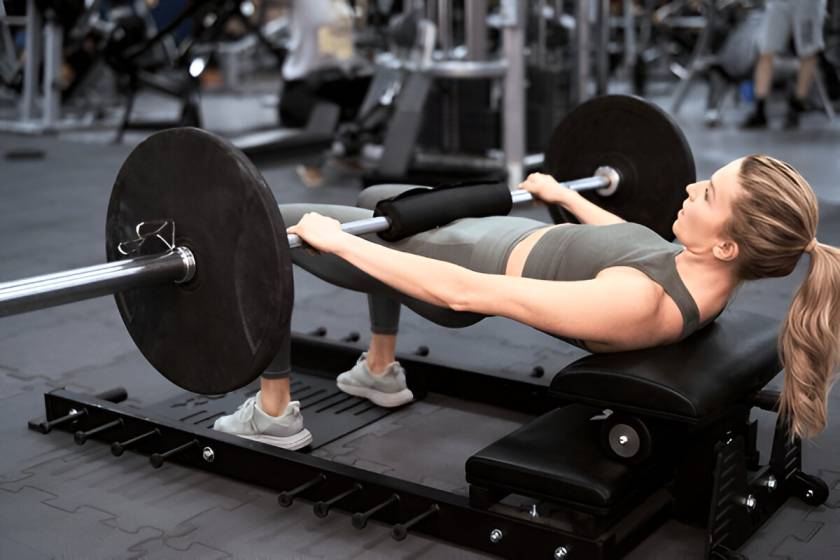
If glute bridges are the beginner’s best friend, hip thrusts are the gym-goer’s secret weapon. This exercise involves sitting on the floor with your upper back against a bench, a barbell across your hips, and thrusting upward.
A 2016 study in the Journal of Applied Biomechanics found that hip thrusts activate the glutes more than many other exercises, including squats, thanks to their greater range of motion.
Muscles Worked
- Primary: Gluteus maximus.
- Secondary: Hamstrings, quads, adductors (inner thighs), and core.
How to Do a Hip Thrust
- Sit on the floor with your upper back against a bench (about mid-back height).
- Roll a barbell (with padding for comfort) over your hips.
- Bend your knees, keep feet flat, and drive through your heels to lift your hips.
- At the top, your body should form a straight line from shoulders to knees.
- Lower slowly and repeat.
Pro Tip: Keep your chin tucked and gaze forward to avoid straining your neck. A neutral spine is key to preventing lower back pain.
Equipment Needed
You’ll need a bench and usually a barbell or dumbbell. A barbell pad or towel helps cushion your hips during heavier lifts.
Variations to Try
- Single-Leg Hip Thrust: Challenge one side at a time.
- Banded Hip Thrust: Use a resistance band for extra tension.
- Bodyweight Hip Thrust: Great for beginners before adding weight.
Common Mistakes
- Wrong Bench Height: Too high or low can mess up your form. Aim for mid-back support.
- Hyperextending the Back: Don’t overarch at the top—focus on glute squeeze.
- Incomplete Range: Fully extend your hips for max glute activation.
Testimonial: “Hip thrusts changed my workout game,” says Mike, a 35-year-old athlete. “I added them to my routine, and my sprint speed and squat strength shot up in just two months!”
Key Differences Between Glute Bridge and Hip Thrust
While both exercises target your glutes, they differ in ways that impact their effectiveness and suitability. Here’s a breakdown:
1. Range of Motion
Glute bridges have a shorter range since you’re on the floor, limiting how high your hips can go. Hip thrusts, with the bench setup, allow a bigger range, leading to greater glute activation.
2. Setup and Equipment
Glute bridges are super accessible—you can do them at home with no gear. Hip thrusts need a bench and often weights, making them more gym-oriented.
3. Muscle Activation
A 2017 EMG study showed hip thrusts activate the gluteus maximus up to 10% more than glute bridges due to the extended range.
4. Difficulty
Glute bridges are easier for beginners to nail down. Hip thrusts require more setup and form precision, making them better for intermediate lifters.
5. Load Capacity
Hip thrusts let you lift heavier weights safely because the bench supports your body. Glute bridges are trickier to load heavily without discomfort.
6. Time Efficiency
Glute bridges are quicker to set up and perform, ideal for short workouts. Hip thrusts take a bit more time but pack a bigger punch for strength.
| Feature | Glute Bridges | Hip Thrusts |
|---|---|---|
| Difficulty | Easier for beginners to master. | Requires more setup and form precision. |
| Load Capacity | Tricky to load heavily without discomfort. | Allows lifting heavier weights safely. |
| Time Efficiency | Faster setup and execution. | Takes more time but offers greater benefits for strength. |
| Equipment Needed | Minimal equipment, often just a mat. | Requires a bench or elevated surface, and often a barbell. |
| Muscle Activation | Focuses on posterior chain muscles, especially glutes. | Targets glutes more intensely, with stronger emphasis on hip extension. |
Discover our guide on building strong, massive legs and glutes at home with practical tips to accelerate your results!
Benefits of Glute Bridges
Glute bridges are a fantastic starting point for anyone looking to strengthen their lower body. Here’s why they’re so great:
- Beginner-Friendly – No gym? No problem! You can do them anywhere with just your body weight.
- Low Impact – They’re gentle on your joints, making them ideal for injury recovery or older adults. A 2020 study in Physical Therapy noted glute bridges help reduce lower back pain by strengthening the posterior chain.
- Core Strength – They engage your abs and obliques, improving stability and posture.
- Versatile – Easily tweak them with weights or variations to match your fitness level.
- Functional Fitness – Strong glutes help with everyday movements like walking, climbing stairs, and sitting properly.
Benefits of Hip Thrusts
Hip thrusts are a favorite among athletes and lifters for a reason. Here’s what they bring to the table:
- Max Glute Power – Their larger range of motion makes them top-tier for building glute strength and size. Research from 2019 in Strength and Conditioning Journal confirms hip thrusts outperform many exercises for glute hypertrophy.
- Boost Athletic Performance – Stronger glutes improve sprinting, jumping, and lifting. Athletes like sprinters and football players swear by them.
- Progressive Overload – You can add serious weight over time, perfect for strength training.
- Injury Prevention – A strong posterior chain reduces strain on your lower back and knees.
- Aesthetic Goals – Want a rounder, more defined backside? Hip thrusts are a go-to for sculpting glutes.
Which Is Best for You?
Choosing between glute bridges and hip thrusts depends on your goals, fitness level, and setup. Here’s a guide to help you decide:
Your Goals
- Strength and Size: Hip thrusts are better for building muscle and power due to their range and load capacity.
- General Fitness or Rehab: Glute bridges are gentler and great for improving mobility or recovering from injury.
Fitness Level
- Beginners: Start with glute bridges to master form and build baseline strength.
- Intermediate/Advanced: Hip thrusts are ideal for pushing your limits with heavier weights.
Equipment Access
- Home Workouts: Glute bridges shine with minimal gear.
- Gym Workouts: Hip thrusts make the most of benches and barbells.
Time Constraints
- Short on Time: Glute bridges are quick and effective.
- Dedicated Sessions: Hip thrusts are worth the setup for focused glute work.
Injury Concerns
- Glute bridges are safer if you have lower back issues or are new to lifting.
- Hip thrusts are great but require perfect form to avoid strain.
Stat: A 2021 survey by the American Council on Exercise found that 65% of trainers recommend glute bridges for beginners, while 80% suggest hip thrusts for advanced clients aiming for glute growth.
How to Combine Both in Your Routine
Why choose one when you can do both? Combining glute bridges and hip thrusts can supercharge your workouts. Here’s how:
- Warm-Up – Use bodyweight glute bridges to activate your glutes before heavier lifts.
- Main Lift – Make hip thrusts your primary strength exercise with a barbell.
- Accessory Work – Add weighted or single-leg glute bridges to finish your workout.
Sample Workout Plan
Day 1 (Glute Focus)
- Bodyweight Glute Bridge: 3 sets of 15 reps.
- Single-Leg Glute Bridge: 2 sets of 12 reps per side.
Day 2 (Strength Focus)
- Barbell Hip Thrust: 4 sets of 8–10 reps.
- Dumbbell Glute Bridge: 3 sets of 12 reps.
Pair these with squats or deadlifts for a balanced lower-body routine. Gradually increase weight or reps to keep progressing.
Discover knee-friendly lower body workouts you can do at home to strengthen your legs without putting stress on your joints—perfect for keeping your routine fresh and effective.
Frequently Asked Questions
Which is better for glute growth?
Hip thrusts, thanks to their greater range and ability to handle heavy weights.
Can I do both in one workout?
Absolutely! Use glute bridges as a warm-up or finisher with hip thrusts as the main lift.
Are glute bridges safe for beginners?
Yes, they’re low impact and easy to learn, perfect for newbies.
Do hip thrusts cause back pain?
Not if you use proper form—keep your spine neutral and avoid overextending.
How often should I do these?
Aim for 2–3 times per week, allowing 48–72 hours for recovery.
Wrapping It Up
Both glute bridges and hip thrusts are fantastic for building a stronger, more toned backside, but they serve different purposes. Glute bridges are perfect for beginners, home workouts, or anyone easing into fitness with minimal equipment. Hip thrusts, on the other hand, are a game-changer for gym-goers chasing serious strength and glute gains. Try both, see what feels best, and track your progress.
Ready to Level Up Your Training?
At Community Strength Austin, we specialize in personalized training programs tailored to help you reach your fitness goals. Whether you’re looking to master your hip thrusts, perfect your glute bridges, or build overall strength and confidence, our experienced trainers are here to guide you every step of the way. Let’s work together to create a stronger, healthier you.
Contact us today to book your first session and start your fitness journey!