Skip to content
Ever stood in front of the mirror, flexed your arms, and thought, “How can I make these biceps stand out even more?”
If you’re hitting the gym with bigger, more defined arms in mind, chances are bicep curls are already your go-to move. But with so many variations out there, how do you know which one’s actually worth your time? Today, we’re putting two fan-favorites head-to-head: spider curls vs. incline curls.
Whether you’re looking to pump up your biceps, sharpen your definition, or just switch up your arm day routine, we’ve got you covered. We’ll break down how these exercises work, their benefits, and which one might help you crush your bicep goals.
Understanding Biceps Anatomy and Function
Before we dive into comparing exercises, let’s give some love to the real MVP here: your biceps. These muscles on the front of your upper arm are made up of two parts, or “heads.” The long head creates that tall, peaked shape, while the short head adds width and thickness. There’s also the brachialis, a smaller muscle underneath that helps with elbow flexion and gives your arms a fuller look. Anytime you bend your elbow or twist your wrist (like when opening a jar), your biceps are doing the heavy lifting.
Different exercises work these muscles in slightly different ways. Some focus on stretching the biceps, while others emphasize the squeeze at the top. Spider curls and incline curls are great for targeting the biceps, but they hit them a little differently, which can affect your results. Knowing how they work can help you pick the best one for your goals—whether it’s building bigger arms, gaining strength, or getting that defined, sculpted look.
What are Spider Curls?
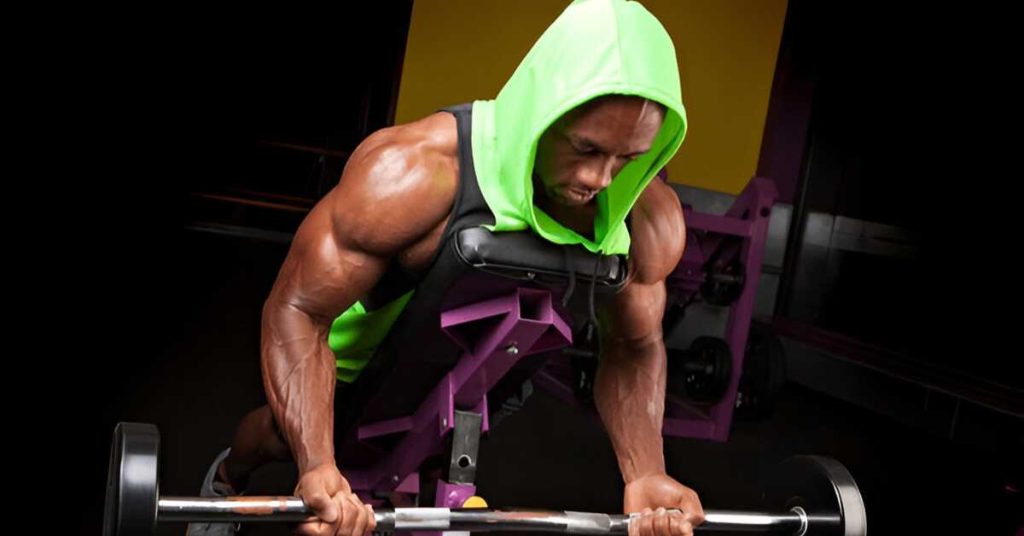
Picture this: you’re lying face-down on a bench, arms dangling straight down, curling a weight with all your focus on your biceps. That’s a spider curl. It’s designed to isolate your biceps, making them do all the work without any cheating. Typically, you’ll use an incline bench set at a steep angle or a preacher bench for this exercise. Your chest rests on the bench while your arms move freely.
How to Do Spider Curls
- Adjust an incline bench to about 45 degrees, or grab a preacher bench.
- Lie face-down with your chest supported and let your arms hang straight down, holding dumbbells or a barbell.
- Keep your elbows steady and curl the weight up toward your shoulders, squeezing your biceps at the top.
- Slowly lower the weight back down—no swinging or rushing the movement!
Spider curls are amazing for targeting your biceps (especially the short head), while also hitting the brachialis and forearms. The secret to making them effective? Stick to strict form—no swaying or using momentum.
A couple of common mistakes to avoid: setting the bench too low, which can strain your shoulders, and rushing through the reps, which takes the focus off your biceps.
What are Incline Curls?

Imagine yourself leaning back on an incline bench, dumbbells in hand, feeling that deep stretch in your arms as you lift. That’s the incline curl—a gym classic that’s simple, effective, and perfect for targeting your biceps. All you need is an incline bench (set at about 45-60 degrees) and a pair of dumbbells.
How to Do Incline Curls
- Set the bench to a 45-60 degree angle and sit back with a dumbbell in each hand.
- Let your arms hang straight down, palms facing up, feeling the stretch in your biceps.
- Slowly curl the weights toward your shoulders while keeping your elbows locked in place.
- Lower the weights back down with control, fully extending your arms to get the most out of the stretch.
Incline curls focus on the biceps, especially the long head, and the brachialis, helping you build arm length and fullness.
Just avoid common mistakes like swinging the weights or setting the bench too upright, which could shift the work to your shoulders. Keep it slow and controlled for the best results!
Comparing Spider Curls to Incline Curls
Now that we’ve covered the basics, let’s compare these two exercises side by side to see which one is better for building arm strength.
1. Muscle Activation and Emphasis
Spider curls are like a laser for your biceps, zeroing in on the short head to create that thick, wide look. They’re all about the peak contraction—that moment when you squeeze your biceps at the top of the curl. Incline curls, on the other hand, emphasize the long head, which adds height and length to your biceps. They create a deep stretch at the bottom, which research suggests can boost muscle growth. Both moves work the biceps, but spider curls are better for isolation, while incline curls offer a fuller range of motion.
2. Range of Motion
Incline curls win for range of motion. The stretched position at the bottom engages your biceps in a way that spider curls can’t match, as spider curls limit the stretch due to the bench setup. A bigger range of motion often means more muscle activation, which is why incline curls are a staple for hypertrophy (muscle growth). Spider curls, however, make up for it with a stronger squeeze at the top, perfect for sculpting that bicep peak.
3. Difficulty and Accessibility
Spider curls can feel a bit tricky at first. You need a specific bench setup, and lying prone might be awkward for beginners. They’re best for intermediate or advanced lifters who want to fine-tune their biceps. Incline curls are more beginner-friendly—just grab a bench and dumbbells, and you’re good to go. Most gyms have incline benches, making this move super accessible.
4. Equipment and Setup
For spider curls, you’ll need a preacher bench or an adjustable bench you can set up for a prone position. You can use dumbbells, a barbell, or an EZ bar for variety. Incline curls are simpler, requiring just an incline bench and dumbbells. If you’re working out at home, incline curls are easier to pull off with basic equipment.
5. Injury Risk and Joint Stress
Both exercises are generally safe when done with proper form. Spider curls are low-impact, as the bench supports your body and keeps the movement isolated. Incline curls can put a bit more stress on your shoulders, especially if you go too heavy or let your elbows drift. To stay safe, use moderate weights and focus on slow, controlled reps.
Spider Curls vs. Incline Curls: A Comparison
| Aspect | Spider Curls | Incline Curls |
|---|---|---|
| Equipment Needed | Bench and dumbbells | Adjustable bench and dumbbells |
| Muscle Focus | Biceps, with emphasis on peak | Biceps, with focus on stretch and length |
| Body Support | Supported on bench, highly isolated | Partially supported, less isolated |
| Range of Motion | Shorter range due to setup | Greater range for a deeper stretch |
| Risk of Injury | Low, as body is fully supported | Moderate, can stress shoulders if form is improper |
| Execution Style | More controlled, focused isolation | Greater engagement of stabilizers |
| Best For | Isolation-focused strength training | Stretch-focused bicep development |
Check out this in-depth comparison of spider curls and preacher curls to see how they measure up: Preacher Curl vs Spider Curl. A great read for anyone aiming to take their arm workouts to the next level!
Benefits of Spider Curls
- Bicep Peak Powerhouse: Spider curls target the short head, helping create that coveted bicep peak that looks great in a tank top.
- No Cheating Allowed: The bench keeps your body locked in, forcing your biceps to do all the work without swinging.
- Versatile Options: You can use dumbbells, barbells, or cables to switch things up.
- Advanced Aesthetic Focus: Perfect for bodybuilders or lifters who want to sculpt their arms with precision.
Benefits of Incline Curls
- Deep Stretch, Big Gains: The extended range of motion stretches your biceps, which can lead to more muscle growth over time.
- Long Head Focus: Builds the height and length of your biceps for a fuller arm look.
- Beginner-Friendly: Easy to learn and perform, even if you’re new to the gym.
- Mind-Muscle Connection: The stretch and slow movement help you “feel” your biceps working, improving control.
Drawbacks and Limitations
Spider Curls
- Limited Stretch: The bench setup restricts the range of motion, so you miss out on the deep stretch that drives growth.
- Setup Hassle: You need the right bench, which might not always be available.
- Learning Curve: Beginners might find the prone position awkward or hard to master.
Incline Curls
- Shoulder Strain Risk: Heavy weights or poor form can stress your shoulders, especially if your bench is too upright.
- Momentum Temptation: It’s easy to swing the weights if you’re not strict, reducing bicep focus.
- Less Peak Contraction: You don’t get the same intense squeeze as spider curls.
Which Exercise is Best for Arm Growth?
So, which curl should you pick? It depends on your goals, experience, and setup. If you’re an advanced lifter chasing a sculpted bicep peak, spider curls are your go-to for their isolation and focus on contraction. If you’re a beginner or want to maximize muscle growth through a bigger range of motion, incline curls are a fantastic choice. Honestly, the best approach might be to use both! Try incline curls early in your workout to stretch and activate your biceps, then finish with spider curls for a killer pump.
Your fitness level matters too. Beginners should start with incline curls to build a foundation, while seasoned lifters can add spider curls for extra detail work. Equipment is another factor—if your gym lacks a preacher bench, incline curls are easier to pull off. Studies on muscle growth suggest that varying your exercises leads to better results, so mixing these moves can keep your biceps growing.
Practical Tips for Incorporating Spider Curls and Incline Curls
Ready to add these to your routine? Here’s how to make the most of them:
- Sets and Reps: Aim for 3-4 sets of 8-12 reps for hypertrophy. Use a weight that challenges you but lets you keep good form.
- Workout Placement: Do these on arm day or pull day, after compound moves like pull-ups or rows.
- Variations: Try cable spider curls for constant tension or single-arm incline curls to focus on each side.
- Warm-Up: Do light dumbbell curls or arm circles to prep your elbows and shoulders.
- Recovery: Rest 48-72 hours between bicep workouts to let your muscles grow, and prioritize protein in your diet.
Discover how Preacher Curls and Incline Curls target your biceps differently—perfect your arm day routine!
Conclusion
Spider curls and incline curls are both awesome tools for building bigger, stronger biceps. Spider curls shine for their isolation and bicep peak focus, making them a favorite for advanced lifters. Incline curls offer a deep stretch and beginner-friendly setup, perfect for anyone looking to grow their arms. The real magic happens when you use both in your routine, hitting your biceps from different angles for balanced development.
Frequently Asked Questions (FAQs)
Are spider curls better than incline curls for bicep growth?
It depends on your goal. Spider curls are great for peak and isolation, while incline curls offer a bigger stretch for overall growth.
Can beginners do these exercises?
Incline curls are easier for beginners, but spider curls are doable with practice.
What’s the best bench angle for incline curls?
A 45-60 degree angle works best to stretch the biceps without straining your shoulders.
Can I do these at home?
Incline curls are easier at home with an adjustable bench. Spider curls need a bench or creative setup (like a sturdy table).
Which is better for bicep peak vs. thickness?
Spider curls for peak (short head), incline curls for thickness (long head).
Ready to Take Your Bicep Training to the Next Level?
Whether you’re perfecting your incline curls or mastering spider curls, having the right guidance can make all the difference in achieving your fitness goals. At Community Strength Austin, we specialize in personalized training programs tailored to your needs—whether you’re here in Austin or connecting with us online. Work with an experienced personal trainer in Austin who will help you build strength, improve form, and optimize your routine for peak results.